How long does it take to learn a handstand?
Learning a freestanding handstand takes 3 to 9 months (30 to 75 hours) of 10- to 15-minute daily wall holds, heel pulls, and balance drills.
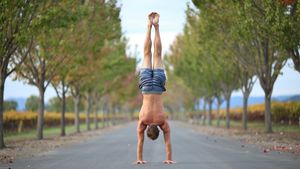
Learning a consistent 10-second freestanding handstand takes 3 to 9 months for most beginners, or roughly 30 to 75 hours of structured practice. Active beginners who already have solid overhead mobility and upper-body strength can reach their first freestanding holds in 1 to 3 months, while holding a clean, repeatable 30- to 60-second line typically takes 6 to 12 months.
The biggest determinant of your speed is whether you train systematic wall progressions or rely on random freestanding kick-ups. As handstand coach Kyle Weiger notes from coaching thousands of adults, students who follow a structured progression regularly unlock 10-second freestanding holds within a few months, whereas people who sporadically kick up in the middle of a room and hope to stick the landing often spend one to two years spinning their wheels.
Handstand progression timeline by stage
A reliable handstand progression moves through four distinct phases, separating joint preparation and upside-down endurance from fine balance calibration.
Here is how the milestones, target hold times, and typical timelines compare when practicing 10 to 15 minutes four to five days a week:
| Stage | Core drill | Target benchmark | Typical timeline |
|---|---|---|---|
| 1. Foundation | Wrist prep & crow pose | 30s crow pose | Weeks 1–4 (5–10 hrs) |
| 2. Alignment | Chest-to-wall hold | 45–60s straight hold | Months 1–3 (15–25 hrs) |
| 3. Rebalancing | Wall heel & toe pulls | 3–5s float off wall | Months 3–6 (30–50 hrs) |
| 4. Freestanding | Split-leg & straight holds | 10–30s freestanding | Months 6–12 (50–100 hrs) |
In his Complete Handstand Guide and written progression, calisthenics coach Tom Merrick (Bodyweight Warrior) recommends starting with bent-arm balances like the frog stand or crow pose alongside elevated pike holds. Crow pose teaches you how to load your body weight forward into your fingertips with your center of mass low to the floor, while box pike holds build the shoulder endurance needed to stay inverted.
Once you can hold an elevated pike for 30 seconds, you move to the wall. Rather than kicking your heels up with your back to the wall, walk your feet up with your chest facing the wall. Facing the wall forces your ribs to stay tucked and your shoulders to stack directly over your wrists, preventing the arched "banana back" that develops when beginners lean their heels against a wall.
Why your fingers and wrists steer the balance
When you stand on your feet, your calves and toes constantly press into the floor to keep you from tipping forward or backward. In a handstand, your wrists and fingers perform that exact same job.
In a 2001 biomechanics study published in Medicine & Science in Sports & Exercise and a 2003 follow-up study in Motor Control, researchers David Kerwin, Maurice Yeadon, and Grant Trewartha measured the joint torques of gymnasts balancing on force plates. They found that skilled handbalancers lock their torso and hips into a rigid, unified column and control their center of mass primarily through rapid adjustments in wrist flexor and extensor torque. Less stable balancers rely on large, delayed shifts at the hips and shoulders, which break their body line and knock them off balance.
Because you have fingers extending in front of your wrists and nothing extending behind the heel of your palm, saving a handstand differs depending on which way you tip:
- Catching an over-balance (falling toward the backs of your hands): When your hips drift past your wrists toward a somersault, you dig your fingertips hard into the floor like claws. That downward pressure shifts your center of pressure forward and pushes your legs back over your hands.
- Catching an under-balance (falling back toward your feet): When your weight drifts back toward the heel of your palm, you have no rear toes to push against. You must release finger pressure completely, shift pressure into the base of your palms, or slightly planche your shoulders forward before gravity pulls your feet down.
Because your fingers give you a strong brake against falling over the top, coaches deliberately teach beginners to err slightly on the side of over-balancing. In their collaboration on how to learn handstands from scratch, physical therapist Daniel Vadnal (FitnessFAQs) and Tom Merrick emphasize learning a clean cartwheel bail on day one. Once your brain knows you can safely step down to the side whenever you tip past vertical, you stop under-kicking out of fear and start reaching the balance point where your fingers can actually work.
How to structure a 15-minute daily handstand routine
Because freestanding balance relies on rapid sensorimotor feedback loops (which Yeadon and Trewartha measured at 160 to 240 milliseconds), your nervous system learns far faster from short, frequent sessions than from a single exhausting workout once a week. Once your forearm flexors and rotator cuffs fatigue after 15 minutes, your wrists lose their fine torque control and additional kick-ups only rehearse sloppy alignment.
A focused 15-minute session practiced four to six days a week splits training into wrist preparation, balance calibration, and wall endurance:
| Block | Drill | Duration | Primary purpose |
|---|---|---|---|
| 1. Joint prep | Wrist pulses & shoulder openers | 3 min | Prepare wrist extension & overhead line |
| 2. Rebalancing | Chest-to-wall heel pulls | 5 min | Train fingertip pressure to catch falls |
| 3. Entry control | Split-leg freestanding kick-ups | 4 min | Practice softly finding the balance window |
| 4. Capacity | Chest-to-wall endurance holds | 3 min | Build 45–60s straight-line stamina |
1. Wrist conditioning and overhead mobility (3 minutes)
Your wrists are not built to bear your full body weight bent at a 90-degree angle without preparation. Spend three minutes performing quadruped wrist rocks, palm pulses (lifting the heels of your hands while keeping your knuckles glued to the floor), and thoracic cat-cows. Opening your lats and upper back before you kick up lets your arms reach a full 180-degree overhead line without arching your lower back to compensate.
2. Heel pulls and toe pulls against the wall (5 minutes)
Walk into a chest-to-wall handstand with your hands placed 4 to 8 inches from the baseboard, as Daniel Vadnal demonstrates in his FitnessFAQs alignment guide. Shrug your shoulders firmly toward your ears, squeeze your glutes, and let only your toes touch the wall. Instead of kicking off with your feet, press down hard through your fingertips until your toes float an inch off the wall. Hold that hover for 3 to 5 seconds using finger pressure alone, lightly tap the wall to reset, and repeat for 3 sets of 4 to 5 reps.
3. Split-leg kick-ups (4 minutes)
Step away from the wall and practice kicking up with your legs split front-to-back like a pair of scissors. Keeping your legs split lowers your center of mass and widens your front-to-back balance window, giving your fingers extra time to catch the entry before you bring your feet together. Rest 30 to 45 seconds between attempts so every kick-up is crisp.
4. Chest-to-wall capacity holds (3 minutes)
Always place your exhausting endurance holds at the very end of the session, never before freestanding balance work. Finish with two 30- to 45-second chest-to-wall holds to build the shoulder and core stamina described in GMB Fitness's handstand progression.
How to track your handstand practice
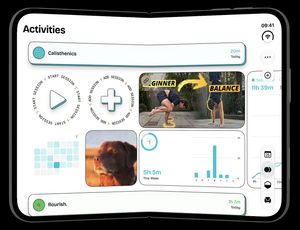
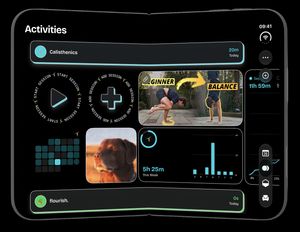
You can use timespent to time your daily handstand sessions, run interval holds without touching your screen, and keep your favorite tutorial videos right next to your practice log.
Create a Timed Activity for your handstand or calisthenics practice and set a 10- to 15-minute daily Do More goal. When practicing chest-to-wall holds or heel pulls, turn on the built-in Interval Timer (for example, 3 sessions of 45 seconds with 60-second rest breaks) so audio cues tell you exactly when to kick up and when to come down while your hands are on the floor. You can also add a Link widget directly to your Activity page to pin your favorite follow-along routine, such as Tom Merrick's beginner handstand guide, letting you play the video right inside the app alongside your timer, weekly bar chart, and calendar heat map.
Common questions
How long will it take at 10 to 20 minutes a day?
Practicing 10 to 20 minutes a day five days a week gets most beginners to a 45-second chest-to-wall hold in about one month and a 10-second freestanding hold in three to six months:
| Practice schedule | Weekly volume | 60s wall hold (~15 hrs) | 10s freestanding (~45 hrs) | 30s freestanding (~75 hrs) |
|---|---|---|---|---|
| 10 min, 4 days/wk | 40 min / wk | ~5 months | ~15 months | ~26 months |
| 15 min, 5 days/wk | 1.25 hrs / wk | ~2.8 months | ~8.5 months | ~14 months |
| 20 min, 6 days/wk | 2 hrs / wk | ~1.7 months | ~5.2 months | ~8.5 months |
At 15 minutes a day for five days a week, 0.25 hours × 5 days = 1.25 hours per week, or 65 hours in a year. Because your wrists and central nervous system recover quickly from short sets, five 15-minute sessions spread across the week build balance far faster than a single 75-minute session on Saturday.
Can you learn a handstand in 30 days?
You can learn a solid chest-to-wall handstand and catch occasional 2- to 5-second freestanding floats in 30 days, but building a reliable 10- to 30-second freestanding hold on command usually takes three to six months. Thirty days of daily practice (about 5 to 7.5 total hours) is enough time to condition your wrists, learn the cartwheel bail, and experience your first brief moments of weightless balance during heel pulls, provided you already have basic upper-body strength.
How long can the average person hold a handstand?
An untrained adult cannot hold a freestanding handstand at all (0 seconds), because balancing upside down requires learned finger-torque reflexes rather than everyday posture. Against a wall, a healthy beginner with average fitness can typically hold a supported handstand for 15 to 30 seconds on their first try. Among people who practice calisthenics or yoga regularly, a 5- to 10-second freestanding hold marks an early intermediate milestone, while a consistent 30- to 60-second freestanding hold represents an advanced standard.
Why do my wrists hurt when practicing handstands?
Handstands place your wrists into 90 degrees of loaded extension while your forearm flexors press hard into the floor to steer your balance. If you skip warm-up pulses or have tight forearm flexors, that compressive load pinches the back of the wrist joint. To relieve wrist strain while your connective tissue adapts over the first 4 to 8 weeks, warm up with 20 palm pulses before kicking up, grip the floor with slightly bent knuckles rather than flat fingers, or elevate your heels of the palm on low yoga wedges or parallettes to reduce the extension angle.