How to get better at drawing
To get better at drawing, practice 20 to 30 minutes a day: warm up with line drills, do focused fundamental studies, and draw from real references.
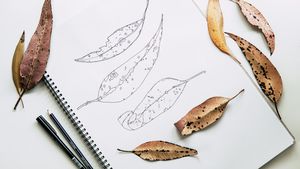
To get better at drawing, practice 20 to 30 minutes a day focusing on fundamental drills rather than polished artwork. Most beginners plateau because they spend hours trying to finish full illustrations before mastering basic line control and perspective. Dividing your daily time between dexterity drills, structured studies from reference, and free sketching builds skill much faster.
On Drawabox, creator Irshad Karim recommends following the "50% rule." You spend half your drawing time on deliberate technical exercises and the other half drawing whatever you want for pure enjoyment, without worrying about how it turns out. Stan Prokopenko, founder of Proko, emphasizes that short daily sessions build visual memory far quicker than weekend marathons. Your brain relies on sleep between practice sessions to consolidate motor patterns and spatial judgment, turning conscious effort into automatic habit.
What should a daily drawing practice routine include?
A warm-up, a deliberate fundamental study, and unstructured sketch time. Structuring your session prevents you from staring at a blank page or getting stuck in endless tutorial videos. Here is how to divide a 20- or 30-minute practice session:
| Part | Focus | 20 minutes | 30 minutes |
|---|---|---|---|
| Warm-up | Line and ellipse drills | 3 min | 5 min |
| Gesture | Quick timed sketches | 5 min | 7 min |
| Core study | Perspective, form, values | 8 min | 12 min |
| Free drawing | Sketching for fun | 4 min | 6 min |
On Practice Drawing This, drawing guides recommend warming up with smooth C-curves, S-curves, and straight lines using your whole arm. When you draw using only your wrist or fingers, the joints pivot in a tight arc and twitch under tension, producing wobbly strokes. Locking your wrist and driving the pencil from your shoulder and elbow recruits larger, more stable muscle groups, which keeps your lines straight and prevents hand fatigue.
Dedicate the middle of your session to quick, timed sketches. Forcing yourself to sketch a pose or object in 30 to 60 seconds gives you no time to fiddle with tiny details like fingernails or eyelashes. You have to capture the overall gesture, weight, and proportions first. Wrapping up each session with a few minutes of relaxed doodling keeps the routine fun and protects you from burnout.
What are the core drawing fundamentals to practice?
Lines, three-dimensional form, perspective, values, and proportions. Isolating these fundamentals makes complex subjects far easier to construct on the page:
- Line confidence: Commit to single, continuous strokes instead of scratchy, feathered marks. Scratchy lines happen when your hand hesitates while second-guessing the path. Plan the start and end points with your eyes first, then pull your pencil across the paper in one smooth, confident sweep.
- Three-dimensional form: Every complex subject breaks down into basic geometric solids: cubes, spheres, cylinders, and cones. If you learn to rotate a simple box in space, you can construct a believable torso, car, or building by stacking and bending those basic volumes.
- Perspective: Perspective governs how objects appear to shrink and how parallel lines converge toward horizon vanishing points. Grasping one-point and two-point perspective keeps your drawings grounded on a consistent surface rather than floating at mismatched angles.
- Values and light: Value is the relative lightness or darkness of a surface. Thoughtful shading maps which planes face the light source and which planes turn away into shadow, creating the illusion of three-dimensional depth on a flat sheet of paper.
- Proportions: Measuring heights, widths, and angles against one another prevents distortion before you invest time in shading. If your initial proportions are off, no amount of detailed rendering will make the drawing look right.
Rather than trying to practice all five fundamentals at once, pick one skill to focus on for an entire week. For example, you can spend one week drawing cylinders at different tilts, followed by a week mapping shadow shapes on everyday household objects.
Why do your drawings look "off" and how do you fix them?
Your brain draws symbolic shortcuts instead of the actual shapes your eyes observe. In Drawing on the Right Side of the Brain, art teacher Betty Edwards explains that beginners struggle because the brain substitutes stored childhood symbols—like drawing an almond for an eye or a stick with a cloud for a tree—in place of real contours and negative space. You end up drawing what you think an object looks like rather than the lines in front of you.
Here are three reliable techniques to overcome symbolic drawing:
- Use the draw, measure, correct loop: On Love Life Drawing, instructors advise sketching a shape by eye, pausing to measure its proportions against your reference, spotting the error, and redrawing the line immediately. Leaving the mistaken mark visible while you correct it shows your brain the exact gap between your guess and reality, training your observational accuracy much faster than erasing blindly.
- Observe negative space: Focus on the empty air around and between objects rather than the object itself. Your brain has no pre-packaged symbol for the triangular gap of air between an elbow and a waistline. Because your brain can't label the empty space, it is forced to observe the actual shape and angle, which automatically locks the surrounding anatomy into place.
- Turn your reference upside down: Flipping a reference photo upside down disables your brain's naming habit. When a face or animal is inverted, your brain stops recognizing eyes, noses, or limbs and sees only abstract lines, angles, and shapes. Drawing those shapes as they appear creates a remarkably accurate result when you turn the paper right-side up.
How many hours a day should you practice drawing?
Most beginners make steady progress with 20 to 30 minutes a day, five to six days a week. Short daily sessions build motor control and visual memory without causing hand fatigue or mental burnout. Advanced students preparing a portfolio or transitioning into professional illustration often practice 2 to 4 hours daily, split into separate morning and evening blocks.
At 30 minutes a day, 0.5 hours × 7 days = 3.5 hours a week, and 0.5 hours × 365 days = 182.5 hours of dedicated practice in a single year. Reaching intermediate competence—where you can comfortably sketch real-world objects and figures with accurate proportions and perspective—usually takes 200 to 500 hours of deliberate study. You can enter your daily drawing time into the 10,000 hours calculator to see when you'll reach major practice milestones.
How do you track your drawing practice?
Log your daily practice time and write brief notes on which exercises you completed. Reviewing a running log helps you spot whether you are spending too much time passively browsing tutorials instead of putting pencil to paper.
Keeping a brief sketchbook log turns vague doodling into focused deliberate practice. In timespent, you can time your drawing sessions and add a quick Reflection after each sketch to log specific exercises, such as "15 minutes of box perspective, 10 minutes of gesture." The app's Activity Trends chart your cumulative pencil-on-paper hours over weeks and months, showing your progression through the 200-to-500-hour intermediate threshold.
Common questions
Is drawing a natural talent or a learned skill?
Drawing is a learned physical and cognitive skill, not an innate gift. Beginners often mistake visual memory for talent: an artist who sketches effortlessly has spent years building a mental library of forms and training fine motor control. Just like learning an instrument or typing, observational accuracy and line control improve predictably once you practice the core mechanics.
Should beginners draw from reference or imagination?
Beginners should draw primarily from real life and high-quality photo references. You can't draw what you don't yet understand. Trying to draw complex subjects from imagination before studying their underlying anatomy and perspective forces your brain to fall back on crude symbolic shortcuts. Working from reference feeds your visual memory with real contours, proportions, and lighting patterns that you can later draw upon from memory.
How do you stop your lines from looking shaky?
Lock your wrist and draw by pivoting from your elbow and shoulder. Planting your wrist on the desk restricts your pencil to a tiny radius, forcing your small finger muscles to make micro-corrections that show up as wobbles on the paper. Moving your whole arm engages larger, more stable shoulder muscles for clean, sweeping strokes. You can also use the ghosting method from Drawabox: hover your pencil tip just above the page and rehearse the stroke two or three times before touching the surface to make a single, decisive line.