Calisthenics skills in order: 5-track skill tree
A 5-track calisthenics skill tree organized by muscle group, showing the order to learn handstand, L-sit, pistol squat, muscle-up, levers, and planche.
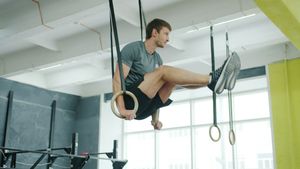
A calisthenics skill tree splits bodyweight moves into five independent tracks by muscle group. Starting with the easiest foundations in each track—like the crow pose, tuck L-sit, strict pull-up, and deep squat—lets you work on two or three different skills at the same time instead of getting stuck on one hard move.
Modeled on former gymnast and physical therapist Steven Low's Overcoming Gravity progression charts, each track below moves from beginner foundations to intermediate holds and advanced levers. Because everyone starts with different limb lengths, joint mobility, and strength history, everyone progresses at a different rate. Treat any timeline as a rough estimate rather than a deadline—putting safety first and staying on an easier step for an extra month is always faster than forcing a hold and losing three to six months to an elbow or shoulder injury.
The 5-track calisthenics skill tree
Each row below is a separate muscle-group track, moving from the easiest calisthenics skills on the left (Stage 1) to advanced holds on the right (Stage 3):
| Skill track | Stage 1: Foundations | Stage 2: Intermediate | Stage 3: Advanced |
|---|---|---|---|
| 1. Handstand & press | Crow pose, wall hold | Freestanding handstand | Handstand push-up |
| 2. Pull & levers | Dead hang, pull-ups | Muscle-up, back lever | Front lever, 1-arm pull |
| 3. Planche & push | Planche lean, dips | Tuck planche | Straddle & full planche |
| 4. L-sit & core | Support hold, tuck L | Full floor L-sit | V-sit & manna |
| 5. Single-leg squat | Flat-heel deep squat | Assisted & full pistol | Shrimp & dragon squat |
Most people sit at different stages across the table depending on their build and training background. It's completely normal to unlock a Stage 2 pistol squat or floor L-sit within a few months while still building Stage 1 pull-ups or chest-to-wall handstands.
Calisthenics skills to learn in order (by track)
Inside each track, the Stage 1 foundation builds the wrist, shoulder, or ankle stability you need for Stage 2 and Stage 3. Moving to the next step only after you can hold your current variation cleanly with zero joint pain across multiple sets prevents elbow and shoulder strains.
1. Handstand & overhead track (Wrists, shoulders, and triceps)
Order: Crow pose → Chest-to-wall handstand → Freestanding handstand → Freestanding handstand push-up.
Crow pose (or frog stand) is one of the easiest calisthenics skills to learn first because it teaches you how to press into your fingertips to catch your balance while your head is only a foot off the floor. Once you can hold a calm 30-second crow pose, calisthenics coach Tom Merrick (Bodyweight Warrior) moves students to chest-to-wall holds and heel pulls in his beginner handstand guide. That wall work builds the 45 to 60 seconds of overhead shoulder endurance needed to practice a freestanding handstand in the middle of the room. Most coaches wait to combine balancing with pressing (the freestanding handstand push-up) until you can already hold a steady handstand for 20 seconds and do at least 8 chest-to-wall pike push-ups.
2. Pull-up, muscle-up & lever track (Back, shoulders, and biceps)
Order: Active hang & strict pull-ups → Bar or ring muscle-up → Back lever → Front lever.
Everything on the pulling branch starts with a base of 10 to 12 strict chest-to-bar pull-ups, which most beginners build in a month or two using regular sets or a 28-day grease the groove cycle. From there, pulling splits into two paths:
- Dynamic pulling (Muscle-up): Combines an explosive chest-to-bar pull with a wrist transition over the bar or rings, as shown in GMB Fitness's strict muscle-up progression.
- Straight-arm levers (Back lever → Front lever): Before training the front lever, most athletes spend two to three months on the German hang (the bottom of a skin-the-cat) and the back lever. Even though both levers hold your body horizontal, the back lever gives your chest and front shoulders better leverage while conditioning your elbow tendons. Once your elbows handle straight-arm load comfortably, physical therapist Daniel Vadnal's FitnessFAQs front lever progression moves from a tight tuck to an advanced tuck (hips at 90 degrees), single-leg, straddle, and finally the full front lever.
3. Planche & pushing track (Front shoulders, wrists, and elbows)
Order: Planche lean & pseudo-planche push-ups → Tuck planche → Advanced tuck planche → Straddle & full planche.
While a handstand stacks your bones vertically over your wrists, a planche holds your body horizontal above your hands with locked elbows. That angle puts heavy rotational force on your front shoulders, wrists, and biceps tendons. As Tom Merrick explains in his planche training breakdown, beginners who immediately try to float their feet off the floor almost always strain their wrists or elbows. Starting with your toes on the floor in a planche lean (turning your hands out 45 degrees, pushing your shoulder blades apart, and leaning your shoulders 4 to 6 inches forward past your wrists) conditions those joints before you lift into a tuck planche.
4. L-sit & core track (Shoulders, hip flexors, and hamstrings)
Order: Parallel bar support hold → Tuck L-sit → One-leg L-sit → Full floor L-sit → V-sit.
When beginners miss their first floor L-sit, weak abs are rarely the main issue. Usually, their shoulders shrug up by their ears and tight hamstrings pull their heels toward the floor. As GMB Fitness covers in its parallette guide, the progression starts in a straight-arm support hold by pressing your shoulders down away from your ears, then pulling your knees up into a tuck L-sit. Straightening your legs into a full floor L-sit or V-sit takes active pike compression strength so your hip flexors and quads can fold your torso forward against hamstring tightness, which improves alongside front splits mobility.
5. Pistol squat & leg track (Ankles, quads, and hips)
Order: Flat-heel resting deep squat → Box or doorframe pistol squat → Full pistol squat → Shrimp squat.
A pistol squat tests your ankle mobility just as much as your single-leg strength. Sitting comfortably at the bottom of a flat-heel deep squat hold for 60 seconds is the main prerequisite; without about 38 degrees of forward ankle flex, your heel pops up and gravity pulls you backward at the bottom of a pistol squat. In its pistol and shrimp squat guide, GMB Fitness suggests squatting down to a knee-high box or holding a light counterweight in front of your chest, then gradually lowering the box height as your ankles open up.
Why straight-arm skills take longer than muscle strength
In bodyweight training, your muscles and nervous system get stronger in 3 to 6 weeks, but your tendons and joint capsules take 3 to 6 months to thicken. Because of that gap, you'll almost always feel muscularly strong enough to force the next skill months before your elbows, wrists, or shoulders are ready to hold it.
Three mechanical factors explain why two people on the same routine move down a track at different speeds:
- Height and limb length change the leverage: Lever skills come down to torque (body weight multiplied by distance from your shoulder or hip joint). An athlete who is 6'2" with long legs faces far more rotational load in a front lever, planche, or L-sit than a 5'5" gymnast with shorter limbs, and naturally spends more months on tuck and straddle variations.
- Tendons adapt three to four times slower than muscle: In a 2015 meta-analysis of 27 human loading studies in Sports Medicine - Open, researchers found that measurable gains in tendon stiffness and thickness take 8 to 12+ weeks of consistent loading. Because tendons have a much smaller blood supply than muscles, a 2010 review in Nature Reviews Rheumatology showed that collagen repair takes 36 to 72 hours of recovery after a heavy session.
- Straightening your legs multiplies the joint load: Every time you open your hips and knees in a lever track (going from a tuck to an advanced tuck, straddle, and straight body), your center of mass moves further from your hands. Even a few inches of leg extension increases the strain on your wrists, front shoulders, and biceps tendons.
As Steven Low notes in Overcoming Tendonitis, overloaded tendons rarely hurt once you're warmed up mid-workout. Instead, early irritation shows up as stiffness the next morning, a sharp twinge when you let go of the bar or parallettes, or pinching at the front of your shoulder. Stepping one variation back to the left on that track for 4 to 6 weeks lets the tendon catch up before a mild ache turns into a long layoff.
How to combine skill tracks in your weekly routine
Practicing 2 or 3 tracks from different muscle groups at the start of your workout three to four days a week lets you build skills while your nervous system is fresh. Because each track uses different joints, you can alternate sets without overlapping fatigue, such as pairing handstands (Track 1), tuck front levers (Track 2), and pistol squats (Track 5) in the same session. The main rule is avoiding two heavy straight-arm exercises that load the biceps tendon (like back levers and planche leans) at full intensity on the same day.
For static holds like the L-sit, back lever, front lever, and planche, holding a single all-out rep to failure drains your nervous system right away. Instead, Steven Low's Isometric Prilepin Table sets each hold at 65% to 75% of your max time so you can accumulate 30 to 60 seconds of clean hold time across 4 to 6 sets:
| Your max hold | Target set (65%–75%) | Sets / session | Total hold volume |
|---|---|---|---|
| 6 seconds | 4 seconds | 6–8 sets | 24–32 sec |
| 10 seconds | 7 seconds | 5–6 sets | 35–42 sec |
| 15 seconds | 10–11 seconds | 4–5 sets | 40–55 sec |
| 20+ seconds | 14–15 seconds | 4 sets | 56–60 sec |
For example, if your best tuck front lever or L-sit hold is 12 seconds, two-thirds of that is 8 seconds (12 seconds × 0.67 = 8 seconds). Doing 5 sets of 8-second holds gives you 40 seconds of clean practice with 90 to 120 seconds of rest between sets. Once 4 sets of 15 to 20 seconds feel solid on your current variation, you're ready to move one step to the right on that track.
How to track your calisthenics skills
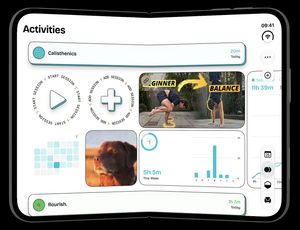
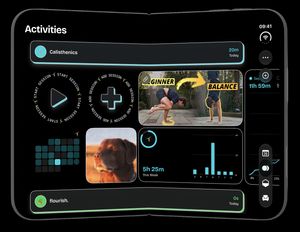
You can use timespent to run hands-free interval holds for your static skills, log dynamic pull-up and squat reps, and organize your active tracks inside a single routine.
Create a Timed Activity for your static holds (such as your handstand, L-sit, or front lever track) and turn on the Interval Timer for 5 rounds of 8-second holds with 90-second rest breaks, so audio chimes tell you when to step up to the bar and when to come down without touching your phone. You can group your active skill tracks alongside a Measured Tally for pull-ups and pistol squats inside an Unscripted Arc. Adding a Link widget to your Activity page also lets you pin a tutorial video (like Tom Merrick's or FitnessFAQs' progression guides) so it plays right inside the app next to your calendar heat map and weekly charts.
Common questions
How long will each stage take at 15 to 20 minutes, 3 to 4 days a week?
Practicing two skill tracks for 15 to 20 minutes at the start of a workout three to four days a week adds up to 40 to 70 hours of focused practice a year:
| Skill schedule | Stage 1 (~8 hrs) | Stage 2 (~45 hrs) | Stage 3 (~120 hrs) |
|---|---|---|---|
| 15 min, 3 days/wk | ~2.5 months | ~14 months | ~2.5–3 years |
| 15 min, 4 days/wk | ~1.8 months | ~10 months | ~2–2.5 years |
| 20 min, 4 days/wk | ~1.4 months | ~8 months | ~1.5–2 years |
At 15 minutes of skill work four days a week, 0.25 hours × 4 days = 1 hour per week, or 52 hours per year of direct balance and hold practice before your main strength work. Because straight-arm tendons need 36 to 72 hours of recovery between heavy workouts, three to four sessions a week build Stage 2 and Stage 3 lever strength much more safely than daily max-effort holds.
How many calisthenics skills should you train at once?
Training 2 to 3 skills from different tracks at a time works best for most people, ideally pairing one upper-body push or balance skill, one upper-body pull skill, and one core or single-leg skill. For example, combining a freestanding handstand (Track 1) with a front lever progression (Track 2) and an L-sit or pistol squat (Track 4 or 5) lets you rotate through sets without overloading the same joints. Stacking two heavy pushing skills (like handstand push-ups and planche) or two heavy pulling skills (like muscle-ups, back lever, and front lever) in the same training block spreads your nervous system and elbow recovery too thin.
Can you learn the front lever or planche without weights?
Yes, every track on the calisthenics skill tree can be unlocked using bodyweight leverage progressions alone, though weighted pull-ups and dips are a useful shortcut if you have a dip belt. Without weights, you increase the load on your muscles by lengthening your body shape: starting with your knees tucked tight to your chest, extending your hips to 90 degrees (advanced tuck), extending one leg out, splitting both legs wide (straddle), and finally bringing both legs straight together. Looping a light resistance band around your waist or feet also helps bridge the big jump in leverage between an advanced tuck and a straddle hold.
Why do my elbows or forearms ache during straight-arm holds?
A dull ache on the inside of your elbow, at the front of your elbow crease, or along your forearm bone ("forearm splints") means your muscles progressed down Track 2 or Track 3 faster than your tendons thickened. When joints ache the morning after a workout or when you let go of the bar or parallettes, stepping one variation back to the left on that track (such as dropping from an advanced tuck back to a regular tuck or planche lean) for 4 to 6 weeks takes the excess torque off the tendon. Releasing your grip from parallettes slowly rather than snapping your hands open, along with 20- to 30-rep wrist curls and slow eccentric biceps curls at the end of a session, also helps promote blood flow while the tissue recovers.